Sunday, September 5, 2010

Sopa de Fideo

This is my last post for a little while, so I figured I'd make it a simple one. Sopa de fideo is a Mexican dish my husband loves. It's like Chicken Soup for the Hispanic's Soul!

First step, as always, is to get your ingredients together.
Now it's time to fry your pasta. Fry my pasta, you say? Yes, indeed! Put a couple tablespoons of oil in your pot and add your pasta.  Fry until golden brown.
While that's browning (KEEP AN EYE ON IT), blend together all the other ingredients.
Add the blended ingredients to your browned fideo, and stir together. At this point, if you'd like to add a meat, like chicken, do so.  Cook until the noodles are limp.
Serve by itself or with a little lemon juice.


1 box vermicelli fideo
3/4 cup chopped tomatoes
4-5 tbs tomato sauce
2 tbs chopped onions
2 tbs oil
1/2 tsp salt
1/4 tsp black pepper
2 cloves garlic
1/2 tsp cumin
2 cups chicken or vegetable broth
3 cups water
1-2 cups cooked chicken, chopped (optional)

Blend all ingredients minus oil, fideo, and chicken.  Fry fideo in oil until golden brown. Add blended ingredients and cook until soupy. Enjoy!

Friday, September 3, 2010

Beef Enchiladas

The beef enchiladas I make tend to take a while.  Even if you take shortcuts (like buying canned enchilada sauce or pre-chopped onions), it takes a good hour and a half to two hours to complete.  However, the end produce is so yummy, it's entirely worth it.

The recipe is broken down into two parts: the beef, and the enchiladas.  First, the beef.

I find it's helpful to gather all your ingredients together to start with.  It saves time in scrambling for them later.
Heat a couple tablespoons of oil in a deep pan. Add onions and saute 3-4 minutes.
Add ground beef and salt, stir it up well.
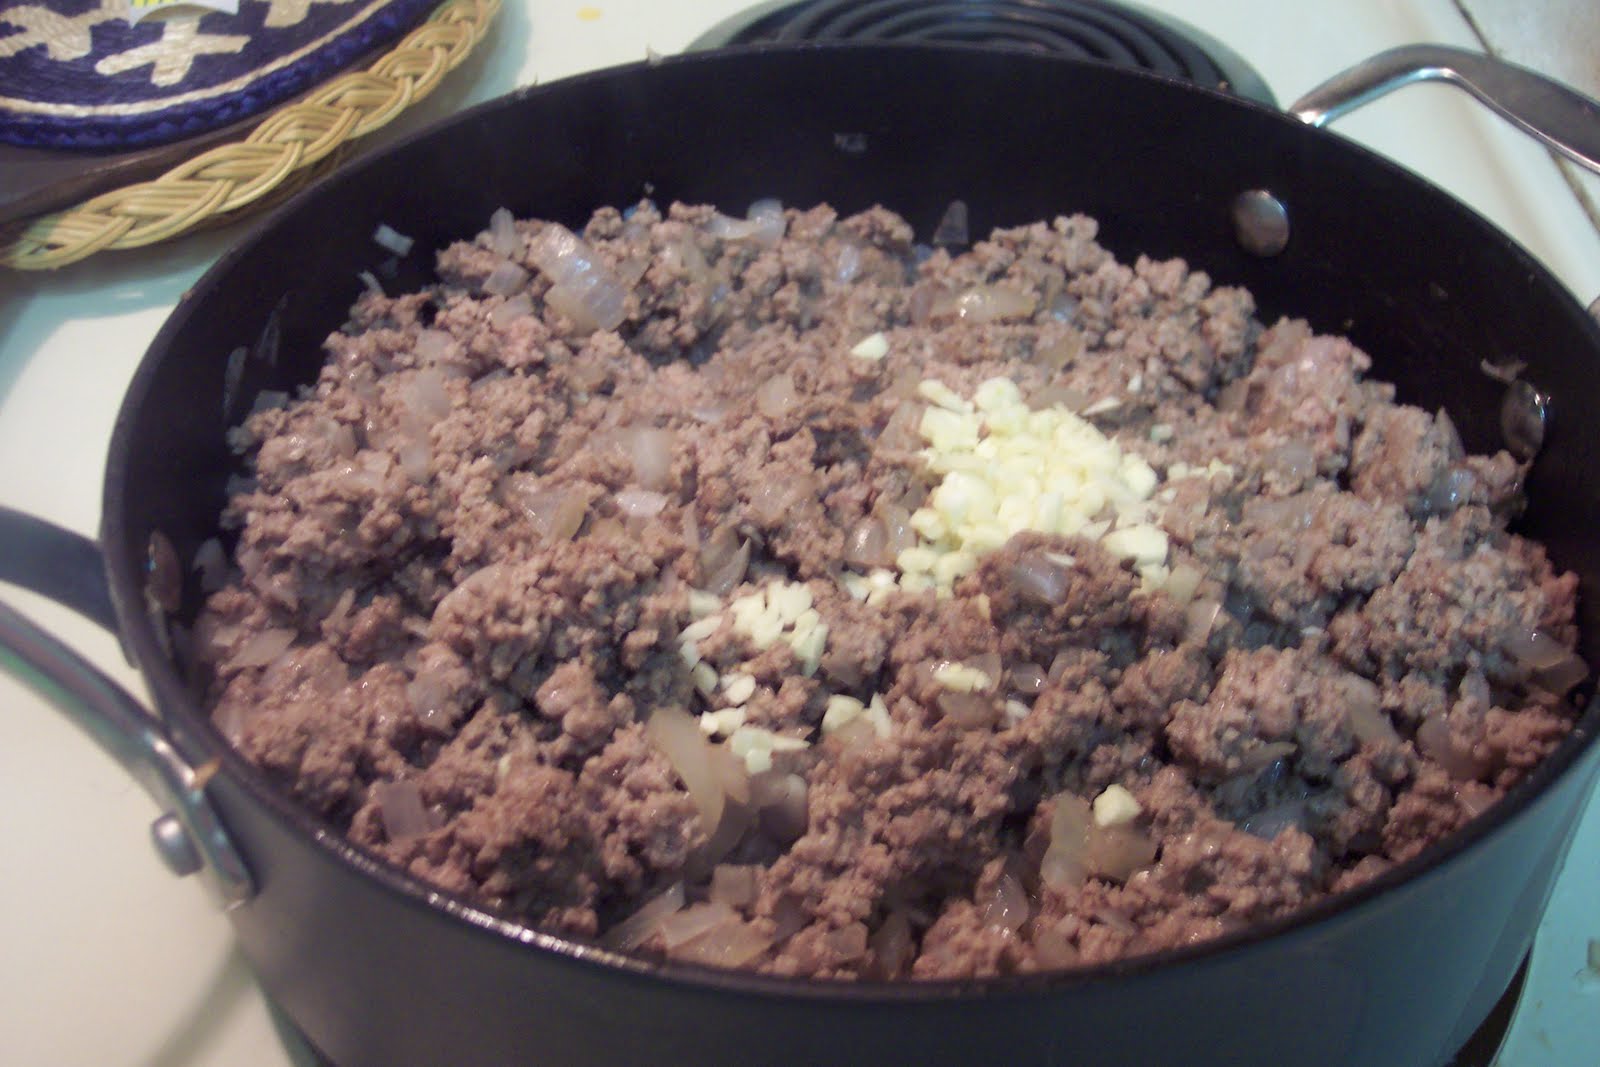
Cook until it's almost done, then add garlic.
Stir it in and cook for another 3 minutes. Then, add cumin, tomato sauce, oregano, and water.
Cook on medium-high for 10 minutes, stirring occasionally.  Lower heat to low and simmer another 10 minutes.  While your meat's simmering, heat an inch of oil in another pan.  Go ahead and get together the ingredients for the enchiladas themselves.
 This is the tricky part.

Dip your corn tortillas, one at a time, into the hot oil. Let it bubble for ONLY 5-7 SECONDS per side.  Any longer than that, and you'll have made yourself a tostada.
Once softened, place your tortilla in your bowl of sauce, covering it with the sauce.  Stack the rest of the softened tortillas into the bowl the same way.
The sauce tends to get a little hot here, so if your hands are sensitive, you may want to cool the bowl down. I placed mine in the freezer for about 5 minutes.

When your meat's finished and your tortillas are sauced, set up an assembly line: first, the sauced tortillas, then the meat, then the baking pan.


This will make it easier to fill your tortillas and place them in the baking pan.


Spread some enchilada sauce around in the bottom of your baking pan.
Here's the messy part.  Grab a tortilla and cup it in your hand.  With your other hand, carefully spoon the meat into the middle of the tortilla.
Fold the edges together, leaving the ends open, and place them seam-down in the pan.
Continue this with the rest of the tortillas.
Notice how some of my enchiladas are cracked or torn. It's okay! They taste the same!  Now top your enchiladas with a little more sauce, then your cheese and onions.
Bake at 400 degrees for about 5-10 minutes, just long enough to get the cheese all hot and bubbly.  Serve with your Mexican favorites, like rice and beans.

Filling:
2 lbs ground beef
1 onion, finely chopped
3 tbs oil
3-4 cloves garlic, minced
2+1/4 tsp cumin
3 tbs oregano
1 cup (8oz) tomato sauce
1+1/2 tsp salt
3/4 cup water

Shells:
15-20 corn tortillas
oil
2 cups cheese
2 cans (about 4 cups) enchilada sauce, emptied into a bowl.
1/4 cup onion, chopped

1. Heat oil, saute onions 3-4 minutes.
2. Add ground beef and salt, cook until almost done.
3. Add garlic, cook 3 minutes.
4. Add cumin, tomato sauce, oregano, and water.
5. Mix well and cook 10 minutes.
6. Reduce heat to low, simmer another 10 minutes.
7. Heat about 1 inch of oil in a pan over medium heat.
8. Dip tortillas, one at a time, into the oil for 5-7 seconds per side.
9. Place softened tortillas into the bowl of enchilada sauce.
10. Fill sauced tortillas with beef, fold, and place into sauced baking pan, seam down.
11. Top with cheese and diced onion.
12. Bake at 400 degrees for 5-10 minute, until the cheese is bubbly.

Enjoy!

Wednesday, September 1, 2010

Parmesan Herb Breaded Chicken

My family eats a LOT of chicken. Like, buy it in the 10 pound bags at Costco, a lot. So I'm always looking for new yummy chicken recipes to try, like this one. It's a very simple shake-n-bake type recipe that goes well with mashed potatoes and steamed veggies.

Start with bread crumbs, grated parmesan cheese, and your herbs, salt, and pepper.
Blend together well in a shallow bowl, large enough to fit one piece of chicken at a time.

 Dredge your chicken in the mixture, coating both sides well.


Place coated chicken in a Pam'd baking dish.
Cut or spoon butter into little dollops and place on the chicken.
Bake at 350 degrees for 40-60 minutes, or until the chicken is no longer pink in the thickest part.

Serve with your favorite side dishes.


4 boneless, skinless chicken breasts (or your choice of chicken cuts)
1/2 cup breadcrumbs (either plain or italian seasoned)
1/2 cup grated parmesan cheese
2 tsp parsley
1 tsp salt
1/2 tsp oregano
1/2 tsp thyme
1/4 tsp black pepper
1-2 tbs butter

Combine all dry ingredients. Dredge chicken in mix. Place in greased baking dish and dot with butter.
Bake at 350 degrees for 40-60 minutes, or until chicken is no longer pink in the thickest part. Enjoy!

Fried Dill Pickles

For my bff, who needed a good recipe. I don't have any pictures for it, but it's good enough to try, I swear.

1 cup flour
1/4 cup cornstarch
1 tsp baking powder
1+1/2 tsp paprika
1/2-1 tsp garlic power
1 egg yolk
1/4 tsp salt
1 cup ice water
2 tbs dill pickle juice
4 cups drained dill pickles
Oil for frying

1. In a bowl with a lid, sift together flour, cornstarch, baking powder, paprika, and garlic powder.
2. Make a well in the middle and add yolk, water, and pickle juice.
3. Whisk together until smooth.
4. Cover and refrigerate 30 minutes.
5. Heat 1-2 inches of oil in a deep pan.
6. If you like a thinner coating on your pickles, dip drained pickle slices in batter and fry for about 5 minutes or until golden brown.
7. If you like a thicker coating on your pickles, dredge your drained pickle slices in plain flour, then batter and fry.
8. Remove from oil and drain on paper towels.

Serve warm with ranch dressing. Enjoy!

Beaver Tails (Fried Bread Dough)

This morning, I made a recipe that my mother used to make for us.  My family loves these Beaver Tails with maple syrup or just cinnamon and sugar. Ingredients are listed at the bottom. Here's how to make Beaver Tails.

Firstly, the bread dough.  Whether you use a bread machine with a dough setting or make it by hand, making the bread dough has to be done the night before you make the tails. The dough must be left to rise in the refrigerator at least 8 hours before frying.  I used a simple white bread recipe in my bread machine, then placed it, covered with a clean cloth, to rise in the fridge overnight.

The next morning, take it from the fridge and remove the cloth.

Notice the dough has a little crust on top. That's alright, it doesn't affect the way the tails are made.
If you have a deep fryer, heat it up to 350 degrees.  My Fry Daddy's an older one, so it doesn't have a temperature control. If you don't have a deep fryer, heat a couple inches of canola or peanut oil in a deep pan over medium to medium-high heat.


Once the oil's all heated, pinch off a piece of the dough.

 Make sure the pinch isn't any bigger than your closed fist, or you'll have trouble stretching it.


Pinch the dough on the edges and stretch it out carefully, try not to tear it. A couple holes are okay, though.


Being careful not to splatter hot oil on yourself, ease the stretched dough into the oil.


After 2-3 minutes, flip the tail over. The underside should be a nice golden brown.


Fry for another 2-3 minutes, until both sides are golden brown, then remove and drain on paper towels.
Serve buttered with cinnamon and sugar, maple syrup, or powdered sugar.


Bread Dough (for a 1.5 lb loaf):
1 cup + 2 tbs water
1+1/2 tbs butter or margarine
1+1/2 tsp salt
3 cups all purpose flour
1 tbs half-and-half
2 tsp sugar
1+1/2 tsp quick-rise yeast

1. Add ingredients as your bread machine manual instructs (mine says wet ingreds first, then dry, then yeast).
2. Select the dough setting and start.
3. Once the cycle completes, transfer the dough into a loaf pan or ceramic dish of a similar shape (I used a 1.5 quart casserole).
4. Cover dough loosely with a clean cloth and place in the refrigerator overnight, at least 8 hours.
5. Heat oil to 350 degrees.
6. Pinch off pieces of the dough no bigger than your fist, and stretch them carefully.
7. Ease stretched dough into the hot oil.
8. After 2-3 minutes, flip dough over. The underside should be golden brown.
9. Fry for another 2-3 minutes, until both sides are golden brown.
10. Remove from oil and drain on paper towels.

Serve with butter and syrup, or cinnamon and sugar, or powdered sugar. Enjoy!